Assign Work Order
Objective: Gain an understanding of how to Assign a Work Order.
Prerequisites: A Work Order that is ready to be assigned must already exist in the system.
The Work Order Assignment tab is accessed by clicking 'Maintenance' in the Navigation Sidebar and 'Operational' from the Navigation Dropdown, and then selecting the 'Assign' tab:

This will display the following dashboard:
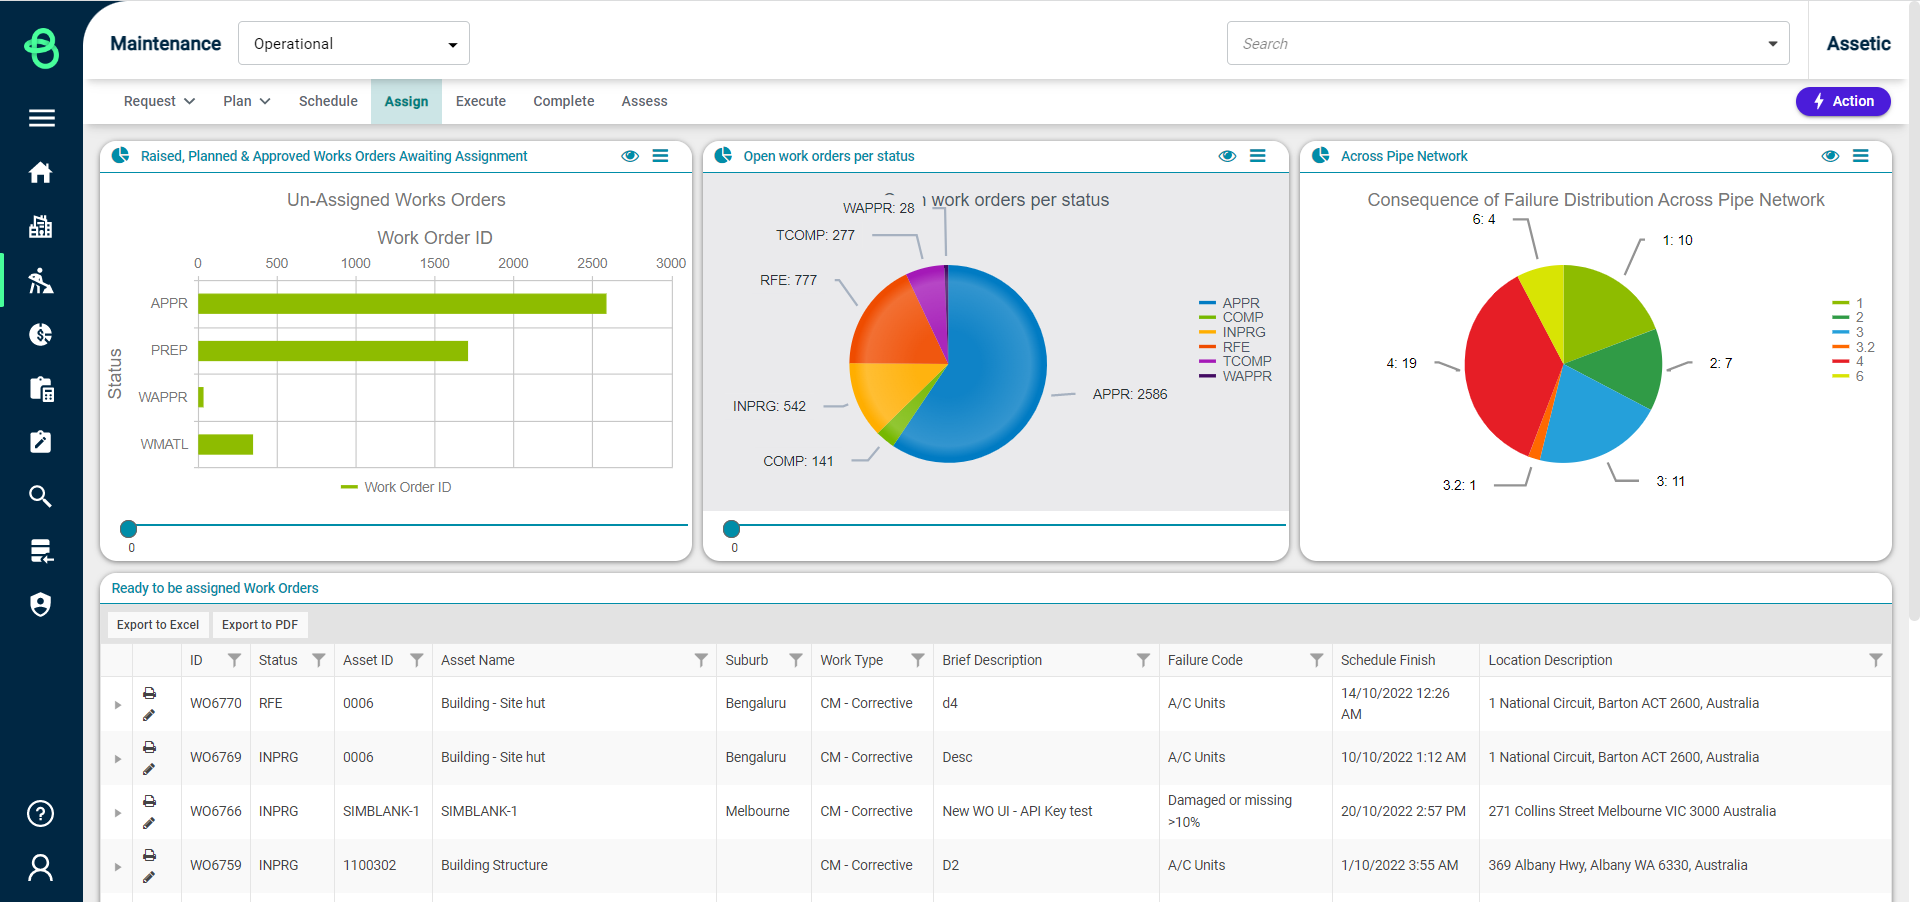
The top three panels can be configured as detailed in the Dashboards section.
Ready to be Assigned Work Orders
The "Ready to be assigned Work Orders" section details those tasks that are ready to be assigned a Resource to complete the work. Resources can be assigned directly from this section, or via the Work Order form itself.

-
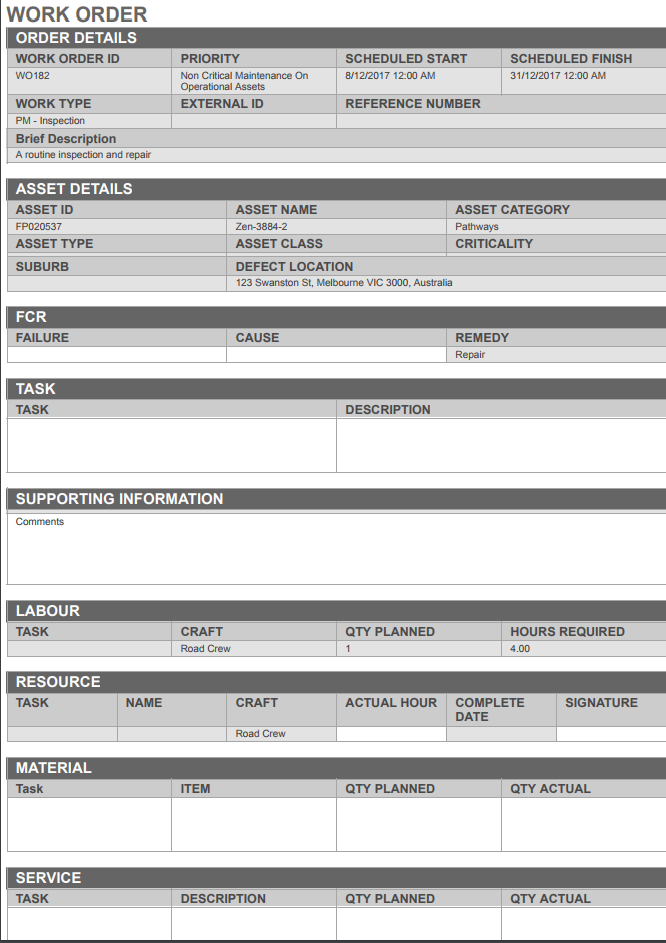
Print (
 ): Clicking this button will open a printable version of the Work Order. An example of a printable Work Order is shown below:
-
Edit (
 ): Clicking this button will open the Work Order, where it can be updated or edited.
 -
ID: The unique work order ID.
-
Status: The WO status field details are automatically populated to show the current workflow status. On the Assign Work Orders screen, all Work Orders will either be in RFE or INPRG status.
-
Asset ID: The unique identifier of the affected Asset selected for the Work Order.
-
Asset Name: Automatically populated field that displays the name of the specific asset the work order refers to.
-
Suburb: Automatically populated field that displays the Suburb where the Asset is located.
-
Work Type: Automatically populated field that displays the work type.
-
Brief Description: Automatically populated with the description information that was entered while creating the WO.
-
Failure Code: The Failure Code selected for the Work Order.
-
Scheduled Finish: Automatically populated field that details when the work is to be completed by.
-
Location Description: Automatically populated field containing the address of the defect location/asset for the Work Order.
-
Arrow: Clicking the arrow will expand the information on the work order as shown below:

-
Task ID: An automatically populated field from the work order. Each task is assigned a number starting from 10, in increments of 10.
-
Status: The status of the task.
-
Craft: An automatically populated field from the work order that details what craft is used for the task.
-
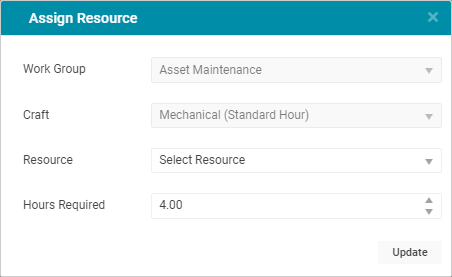
Resource: The default state for this is "Unassigned", by clicking on this the 'Assign Resource' pop-up is opened:
-
Select Work Group: A drop-down list that details the workgroup that can be associated with the Asset. This will be pre-filled if the Asset already belongs to a Work Group.
-
Select Craft: A drop-down list that details the crafts that can be associated with the Asset. This will be pre-filled if the Asset already belongs to a Work Group.
-
Select Resource: A drop-down list that details active resources that can be assigned to the job. Resources set to 'Inactive' cannot be assigned as a Resource however, 'Inactive' resources already assigned to an existing Work Order can be updated.
-
Hours Required: A numeric field to input the hours of work required for the task assigned to the selected Resource.
-
Update: A button that is able to be selected to update the work order and confirm the assignment of the resource.
-
Completion Date: The date that the task was completed by the Resource.
-
Actual Hours: The actual amount of time taken to complete the task.
If a specific Work Order has opened using the Edit button ( ), active Resources can be assigned to Tasks by navigating to the Resource section of the Work Order:

Assign Work Workflow:
